NestJS에서 Swagger 문서를 모듈 별로 분리하여 주소로 나누어 출력하는 방법
2023.02.06 - [개발 프레임워크/NestJS] - [NestJS] Swagger(스웨거)란?
[NestJS] Swagger(스웨거)란?
NestJS 형상관리 도구_스웨거(Swagger) Swagger(스웨거)는 개발자가 REST 웹 서비스를 설계, 빌드, 문서화, 소비하는 일을 도와주는 대형 도구 생태계의 지원을 받는 오픈 소스 소프트웨어 프레임워크라
kfdd6630.tistory.com
기본적인 사용 방법
import { NestFactory } from '@nestjs/core';
import { NestExpressApplication } from '@nestjs/platform-express';
import { DocumentBuilder, SwaggerModule } from '@nestjs/swagger';
import { AppModule } from './app.module';

async function bootstrap() {
  const app = await NestFactory.create<NestExpressApplication>(AppModule);

  const swaggerConfig = new DocumentBuilder()
    .setTitle('API server')
    .setDescription("The API server's API description")
    .setVersion('1.0')
    .build();
  const document = SwaggerModule.createDocument(app, swaggerConfig);
  SwaggerModule.setup('api', app, document);

  await app.listen(3000);
}
bootstrap();
NestJS에서 Swagger 문서를 모듈 별로 분리하여 주소로 나누어 출력하는 방법은 위 코드에서
1. L15에서 SwaggerModule.createDocument를 생성하는 곳에 분리하고 싶은 모듈을 include 해준다.
2. L16에서 SwaggerModule.setup에서 주소 설정(분리)을 해준다.
적용방법
아래 코드는 UserModule을 Swagger문서의 주소를 api/users로 설정해 주고 있다.
const firstoptions = new DocumentBuilder()
    .setTitle('Users example')
    .setDescription('The users API description')
    .setVersion('1.0')
    .build();
  const userDocument = SwaggerModule.createDocument(app, firstoptions, {
    include: [UserModule],
  });

  SwaggerModule.setup('api/users', app, userDocument);
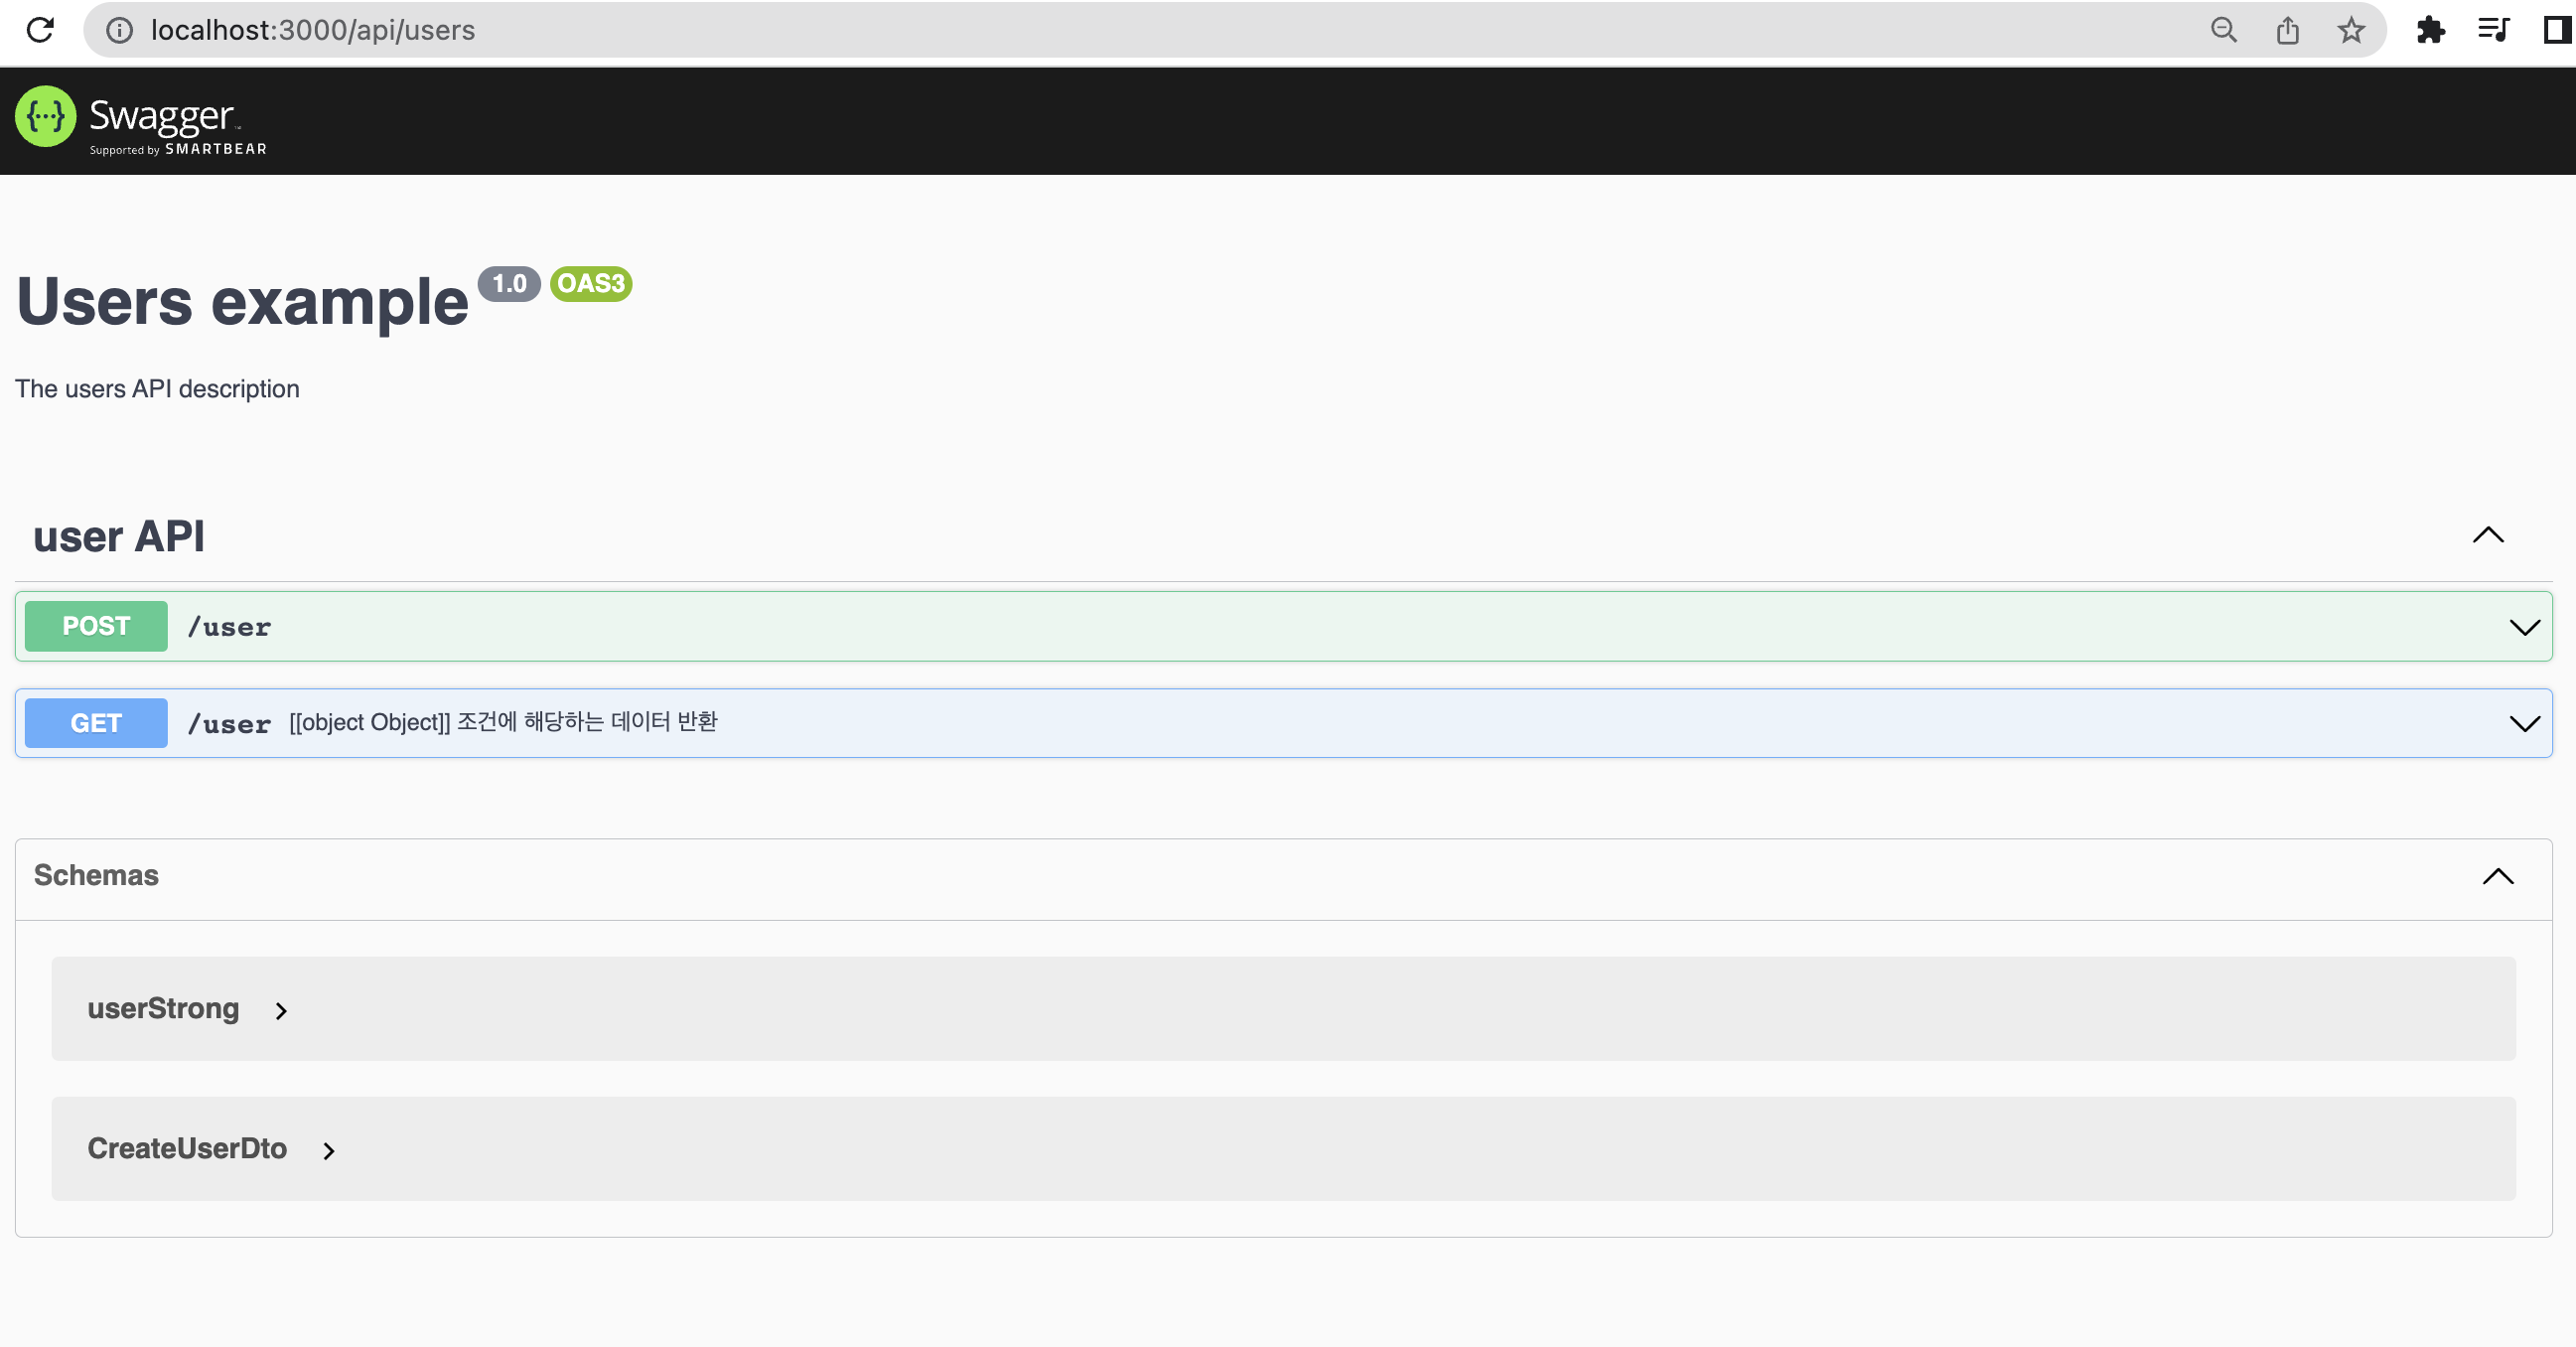
따로 설정을 하지 않고 app.listen(3000);으로 서버를 실행하고 있다면 아래코드와 같이 http://localhost:3000/api/users에서 확인할 수 있다.
User 모듈에 대한 Swagger UI (http://localhost:3000/api/users)
아래 코드는 UserModule을 Swagger문서의 주소를 api/monsters로 설정해 주고 있다.
const secondOptions = new DocumentBuilder()
    .setTitle('Monsters example')
    .setDescription('The monsters API description')
    .setVersion('1.0')
    .build();

  const monstersDocument = SwaggerModule.createDocument(app, secondOptions, {
    ignoreGlobalPrefix: true,
    include: [MonsterModule],
  });
  SwaggerModule.setup('api/monsters', app, monstersDocument);
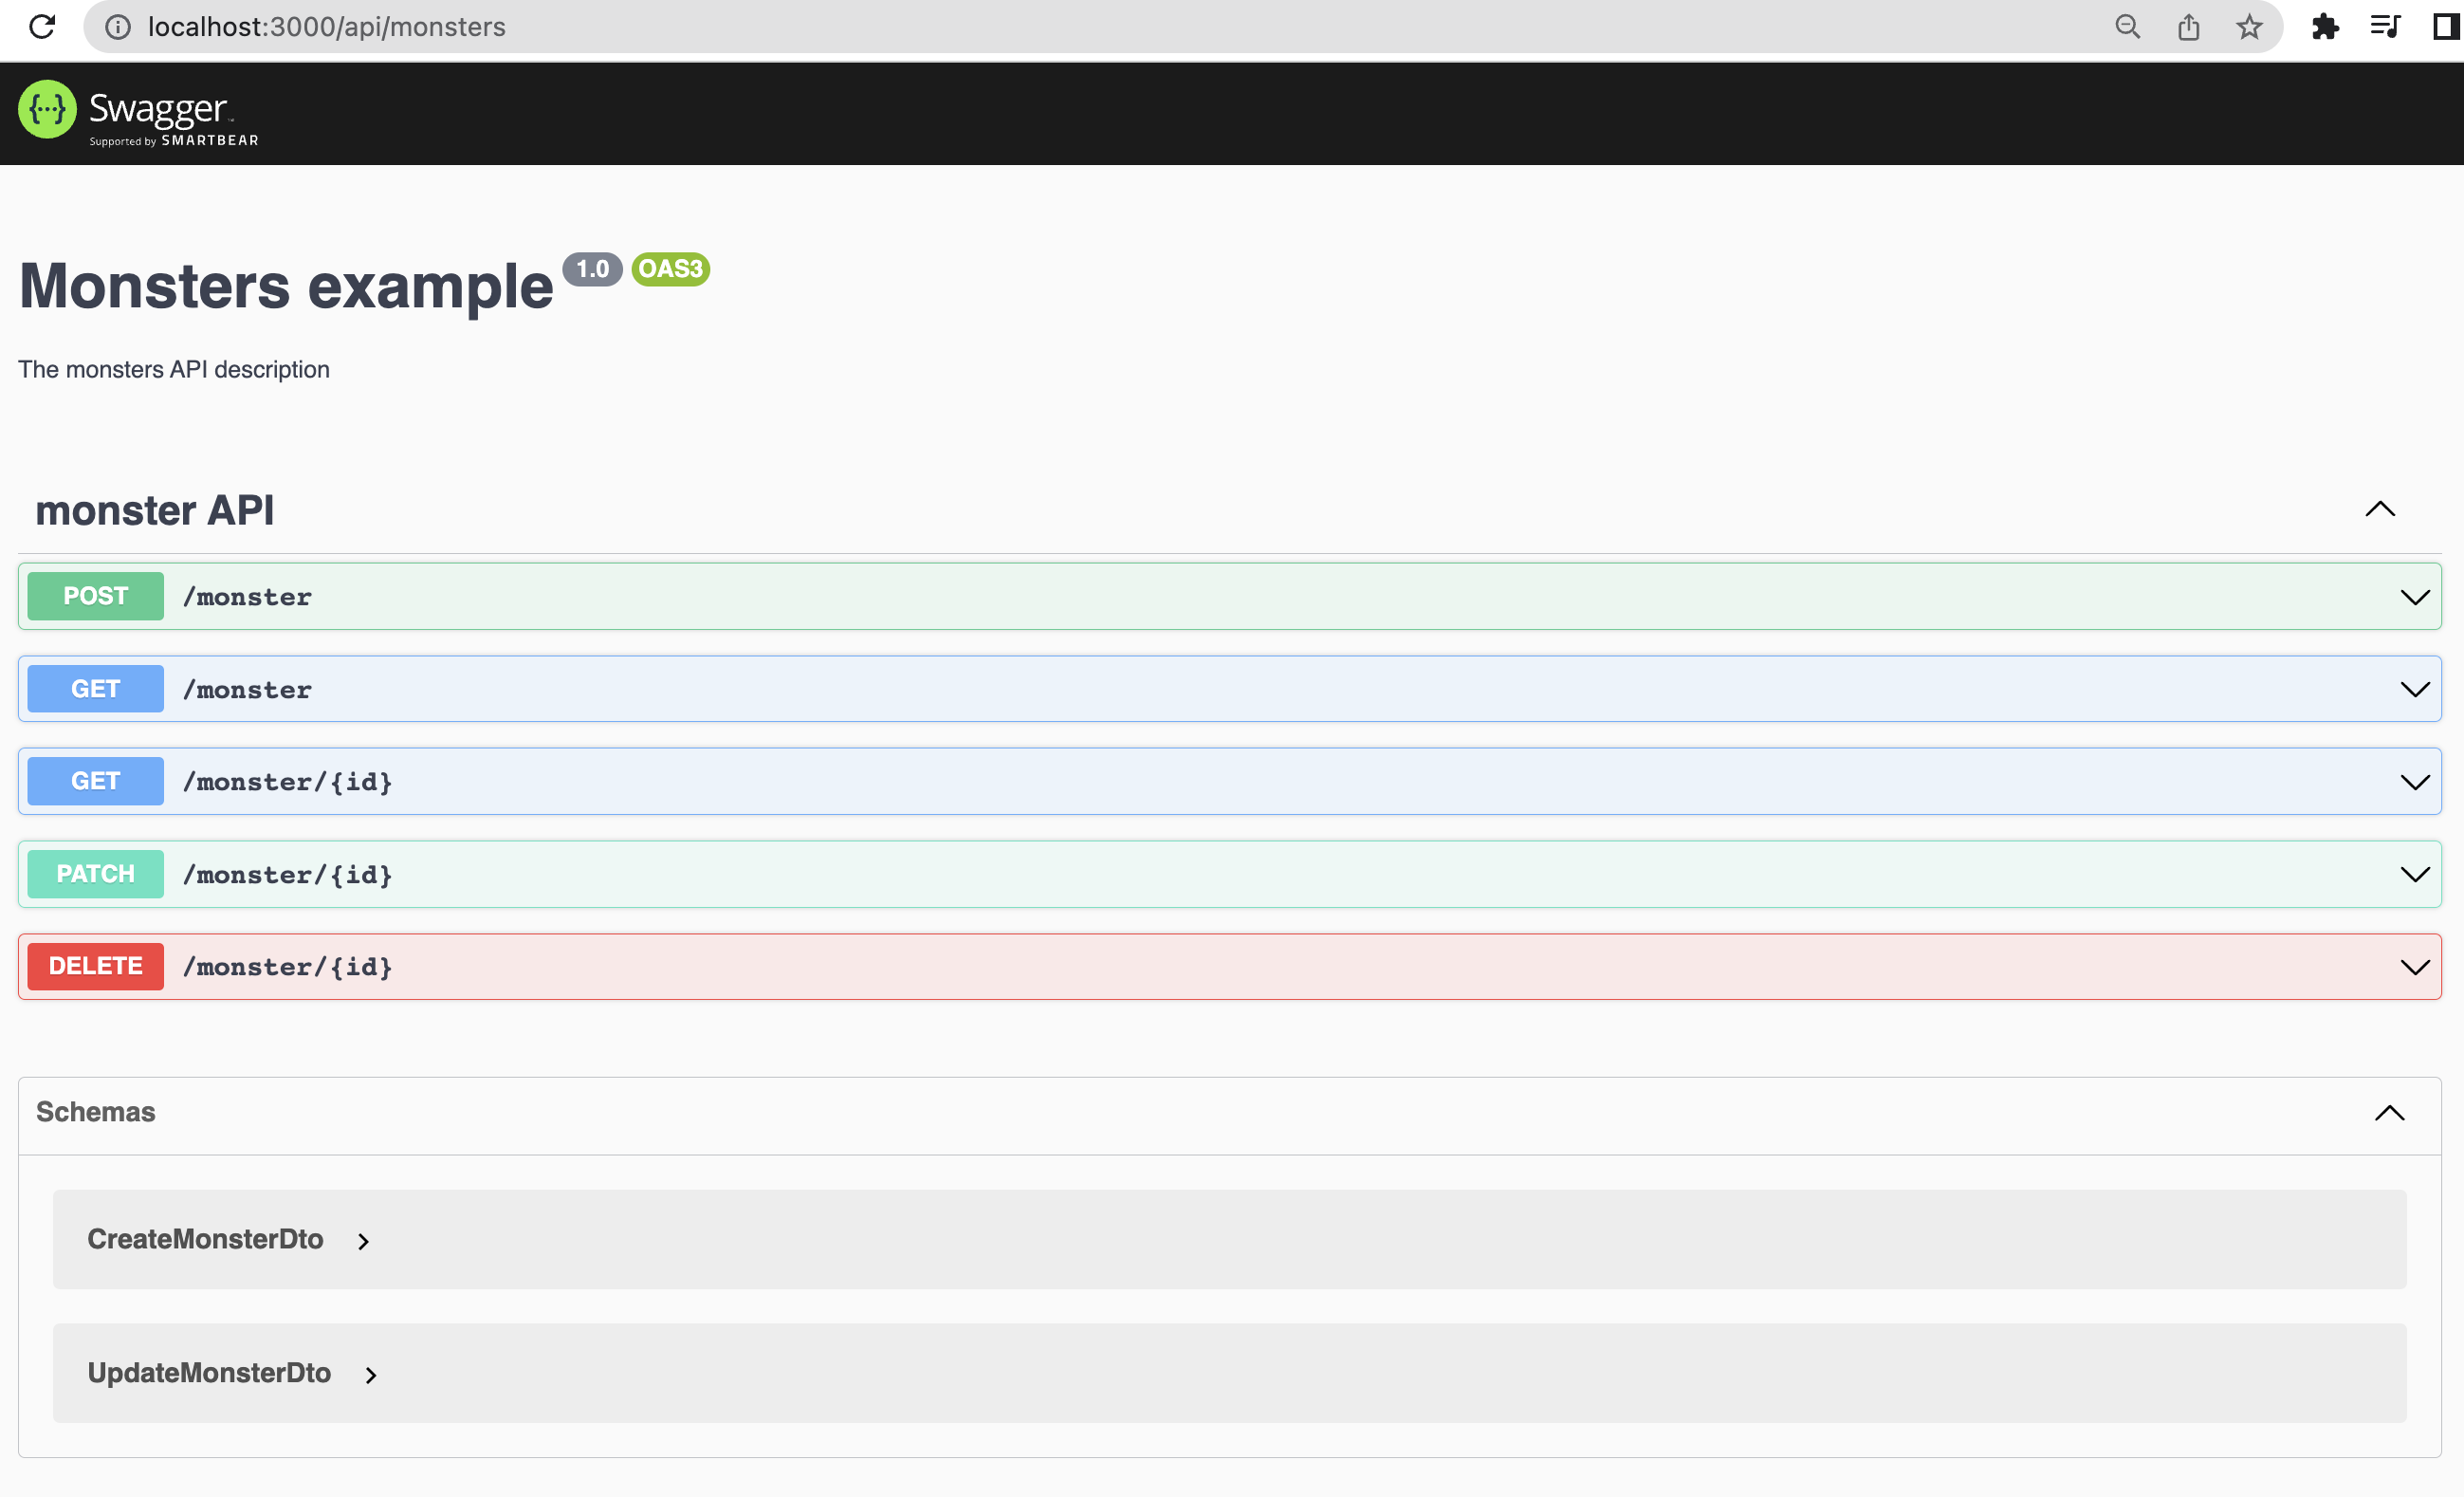
따로 설정을 하지 않고 app.listen(3000);으로 서버를 실행하고 있다면 아래코드와 같이 http://localhost:3000/api/monsters에서 확인할 수 있다.
Monster모듈에 대한 Swagger UI (http://localhost:3000/api/monsters)
위와 같이 2개 모듈에 대한 Swagger설정만 해준다면 http://localhost:3000/api로 설정되는 전체 Swagger 문서는 사라진다.
기본적으로 설정된 전체 Swagger UI가 비정상적으로 출력된다. (http://localhost:3000/api)

SwaggerModule.createDocument에 모듈을 include 해주지 않고 SwaggerModule.setup에서 주소를 api로 설정하는 전체 기본 Swagger 문서. 즉, http://localhost:3000/api에서 출력되는 Swagger UI는 존재하지 않기 때문에 위와 같이 404 Error가 출력된다.
위 코드 조각들에 대한 전체 코드이다.
import { NestFactory } from '@nestjs/core';
import { NestExpressApplication } from '@nestjs/platform-express';
import { DocumentBuilder, SwaggerModule } from '@nestjs/swagger';
import { AppModule } from './app.module';
import { MonsterModule } from './monster/monster.module';
import { UserModule } from './user/user.module';

async function bootstrap() {
  const app = await NestFactory.create<NestExpressApplication>(AppModule);

  const firstoptions = new DocumentBuilder()
    .setTitle('Users example')
    .setDescription('The users API description')
    .setVersion('1.0')
    .build();
  const userDocument = SwaggerModule.createDocument(app, firstoptions, {
    include: [UserModule],
  });

  SwaggerModule.setup('api/users', app, userDocument);

  const secondOptions = new DocumentBuilder()
    .setTitle('Monsters example')
    .setDescription('The monsters API description')
    .setVersion('1.0')
    .build();

  const monstersDocument = SwaggerModule.createDocument(app, secondOptions, {
    ignoreGlobalPrefix: true,
    include: [MonsterModule],
  });
  SwaggerModule.setup('api/monsters', app, monstersDocument);

  await app.listen(3000);
}
bootstrap();
기본적으로 설정되는 전체 Swagger UI를 포함한 전체 코드이다.
import { NestFactory } from '@nestjs/core';
import { NestExpressApplication } from '@nestjs/platform-express';
import { DocumentBuilder, SwaggerModule } from '@nestjs/swagger';
import { AppModule } from './app.module';
import { MonsterModule } from './monster/monster.module';
import { UserModule } from './user/user.module';

async function bootstrap() {
  const app = await NestFactory.create<NestExpressApplication>(AppModule);

  const swaggerConfig = new DocumentBuilder()
    .setTitle('API server')
    .setDescription("The API server's API description")
    .setVersion('1.0')
    .build();
  const document = SwaggerModule.createDocument(app, swaggerConfig);
  SwaggerModule.setup('api', app, document);

  const options = new DocumentBuilder()
    .setTitle('Users example')
    .setDescription('The users API description')
    .setVersion('1.0')
    .build();
  const userDocument = SwaggerModule.createDocument(app, options, {
    include: [UserModule],
  });

  SwaggerModule.setup('api/users', app, userDocument);

  const secondOptions = new DocumentBuilder()
    .setTitle('Monsters example')
    .setDescription('The monsters API description')
    .setVersion('1.0')
    .build();

  const monstersDocument = SwaggerModule.createDocument(app, secondOptions, {
    ignoreGlobalPrefix: true,
    include: [MonsterModule],
  });
  SwaggerModule.setup('api/monsters', app, monstersDocument);

  await app.listen(3000);
}
bootstrap();
기본적으로 설정된 전체 Swagger UI가 정상적으로 출력된다. (http://localhost:3000/api)

User 모듈에 대한 Swagger UI (http://localhost:3000/api/users)
Monster모듈에 대한 Swagger UI (http://localhost:3000/api/monsters)
위와 같이 분리한 User 모듈과 Monster 모듈에 대한 Swagger 문서 또한 잘 출력된다.
'개발 프레임워크 > NestJS' 카테고리의 다른 글
| [NestJS] 데이터 추출(페이지네이션), skip(), hasNext(), next() (0) | 2023.02.20 |
|---|---|
| [NestJS] 개발환경 구성 (0) | 2023.02.20 |
| [NestJS] 타입 종류_Swagger (0) | 2023.02.10 |
| [NestJS] Type(타입)_Swagger (0) | 2023.02.09 |
| [NestJS] Parameters(매개변수)_Swagger (0) | 2023.02.08 |


댓글