반응형
깃허브와 프로젝트(로컬 or 서버) 연결하는 방법 (로컬 -> Github, Github -> 로컬), [Git] ! [rejected] master -> master (non-fast-forward) 해결 방법
Github와 프로젝트 폴더 연결 ( 프로젝트 폴더(로컬) <- Github )
1. Github에 프로젝트 repository를 먼저 추가한다.
2. 로컬이나 서버에 생성하고 싶은 위치에
$ git clone '[클론 주소]'
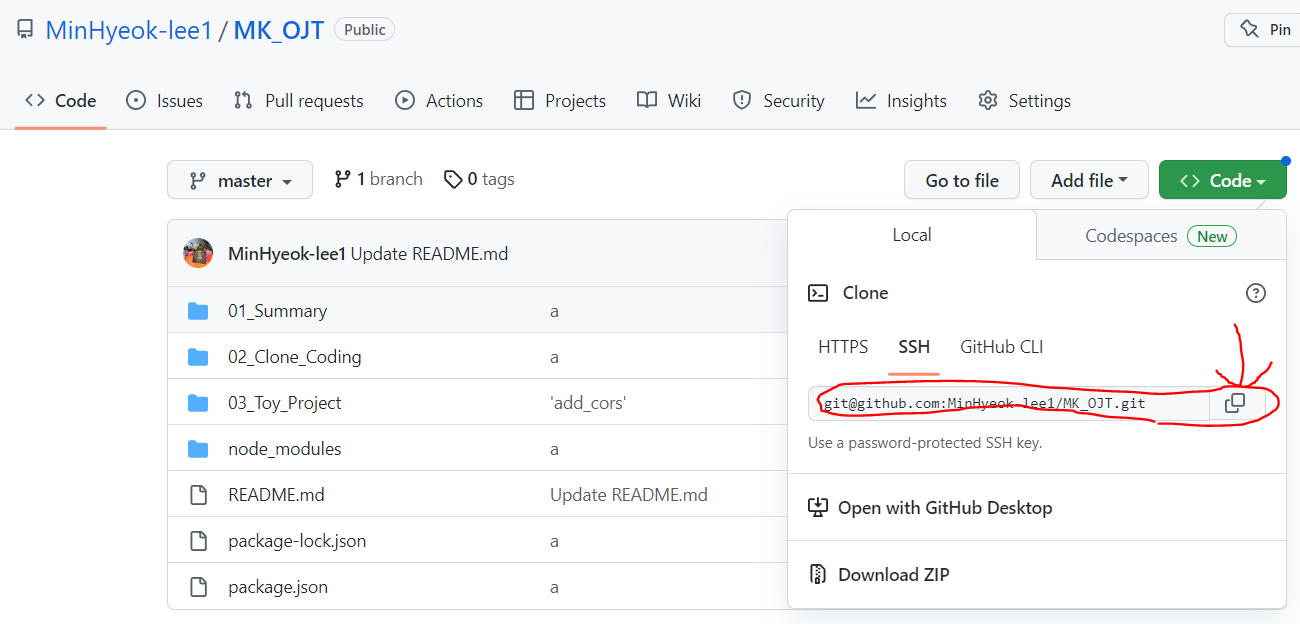
* 깃허브 우측 상단 <> Code를 누른 이후 나오는 주소를 복사하고 붙여넣으면 된다.
Github와 프로젝트 폴더 연결 ( 프로젝트 폴더(로컬) -> Github )
기존에 있는 프로젝트를 연결하는 방법 (프로젝트 폴더 -> Github )
1. git 초기화
$ git init
2. 새 repository에 파일을 업로드 하기 위해 스테이지에 파일을 올린다.
$ git add .
// 혹은 README.md가 없는경우
$ git add README.md
3. 최초 커밋
$ git commit -m "commit message"
4. github 등 프로젝트를 연결 할 repository 생성 및 연결한다.
$ git branch -M master
$ git remote add origin '[클론 주소]'
-> 본 순서는 가장 먼저해도 된다.
5. 새 repository에서 내용을 받음(pull)으로써 git history를 동기화한다.
$ git pull origin master
6. repository에 파일 업로드(push)
$ git push -u origin master
* [Git] ! [rejected] master -> master (non-fast-forward) 해결 방법
$ git push origin +master
위 내용 정리
깃허브 최초 생성 후 연결 (readMe 생성 o)
echo "# repositoryName" >> README.md
git init
git add README.md
git commit -m "first commit"
git branch -M master
git remote add origin '연결주소'
git push -u origin master
반응형
'개발 환경세팅 > Git, Github' 카테고리의 다른 글
| [Github] GitHub 계정에 새 SSH 키 추가하는 방법 (0) | 2023.06.27 |
|---|---|
| [Github] 새 SSH 키 생성 및 ssh-agent에 추가 (1) | 2023.06.18 |
| [Github] master, main branch 병합하는 방법 (master -> main, main -> master) (0) | 2023.06.18 |
| [GitHub] branch 기본 명령어 (0) | 2023.02.27 |
| [Github] 원격 저장소 ssh 연결 및 설정(git remote, git config) (0) | 2023.02.04 |

댓글